
Tiva LaunchPad Project
Experiments 5–10 run on the real chip: the TM4C123GH6PM on the Tiva C LaunchPad. This guide builds a project from an empty folder, flashes a blinking-LED program onto the board, and shows you how to debug it live. Do it once before your first hardware lab; if the LED blinks, your whole setup is working.
Before you start
You need all four steps of the setup guide done: Keil, the TM4C pack, the Stellaris ICDI add-on, and the USB drivers. Have the LaunchPad plugged into the DEBUG port with the switch on DEBUG.
The whole thing in 30 seconds (once you've done it before)
- Project → New µVision Project… → new folder → name it → Save.
- Device: Texas Instruments → Tiva C Series → TM4C123x Series → TM4C123GH6PM → OK.
- Run-Time Environment: tick CMSIS → CORE and Device → Startup → OK.
- Right-click Source Group 1 → Add New Item… →
main.c(ormain.s). - Alt+F7 → Debug → Use: Stellaris ICDI.
- F7 build, F8 download, press RESET on the board.
How this differs from an assembly project
| Assembly project | Tiva LaunchPad project | |
|---|---|---|
| Device | ARMCM4 (generic) | TM4C123GH6PM |
| Vector table | You write it (AREA RESET) | Provided by startup_TM4C123.s |
| Your program starts at | Reset_Handler | main (C) or __main (assembly) |
| Peripherals (GPIO, timers…) | None | All of them, real |
| Runs on | Your PC | The board |
Step 1: Make a folder for the project
Use a short path with no spaces, for example:
C:\ENCS4110\Exp5Avoid OneDrive-synced folders (Desktop, Documents) and Arabic folder names.
Step 2: Create the project
- Open Keil uVision5. If a project opens automatically, close it with Project → Close Project.
- Project → New µVision Project…
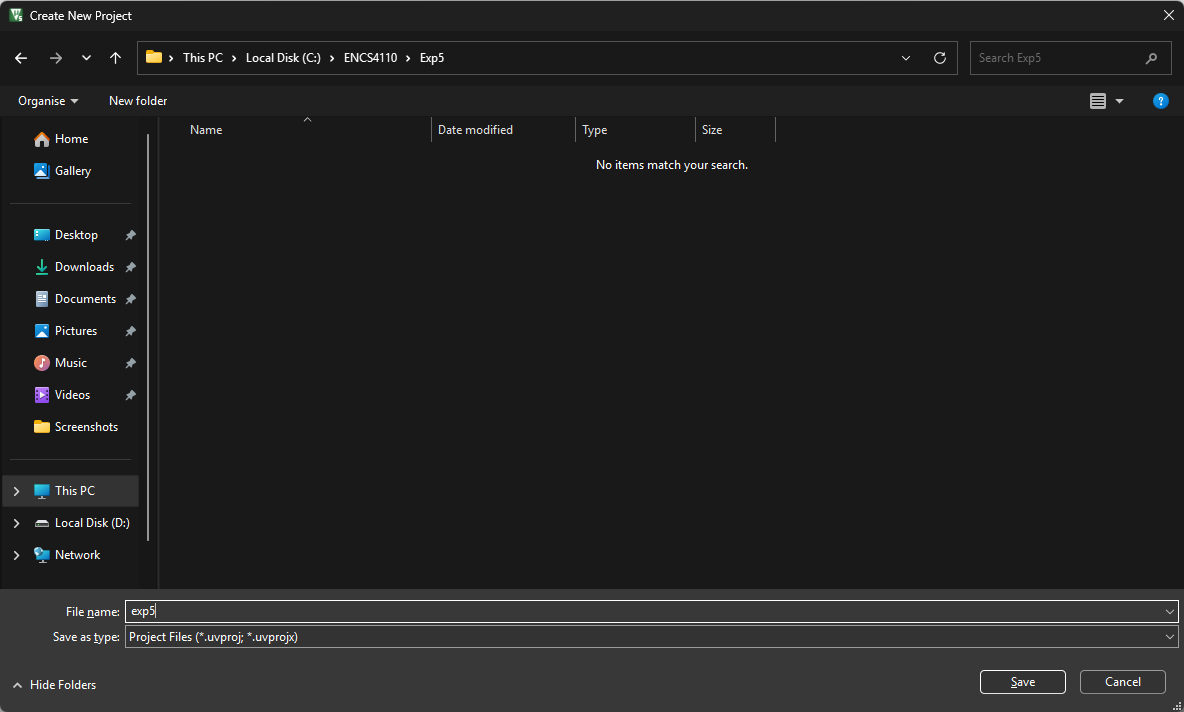
- Browse to your folder, type a name such as
exp5, and click Save.
Step 3: Choose the TM4C123GH6PM
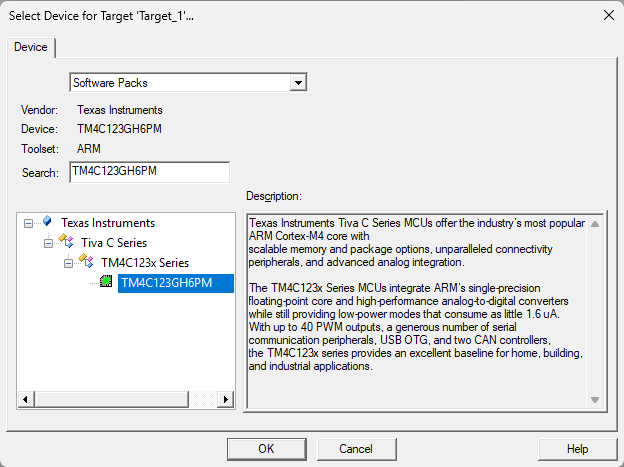
In the Select Device for Target window:
- Make sure the top-left drop-down says Software Packs.
- Type
TM4C123GH6PMin the Search box, or expand Texas Instruments → Tiva C Series → TM4C123x Series. - Select TM4C123GH6PM and click OK.
Check the exact name
It's TM4C123GH6PM: the chip printed on the LaunchPad. Similar-looking parts (TM4C123GH6PGE, TM4C1233H6PM…) build fine but have different pins and memory, and things go wrong later in confusing ways.
If the Texas Instruments entry is missing, the TM4C pack isn't installed: see setup Step 2.
Step 4: Add the startup files
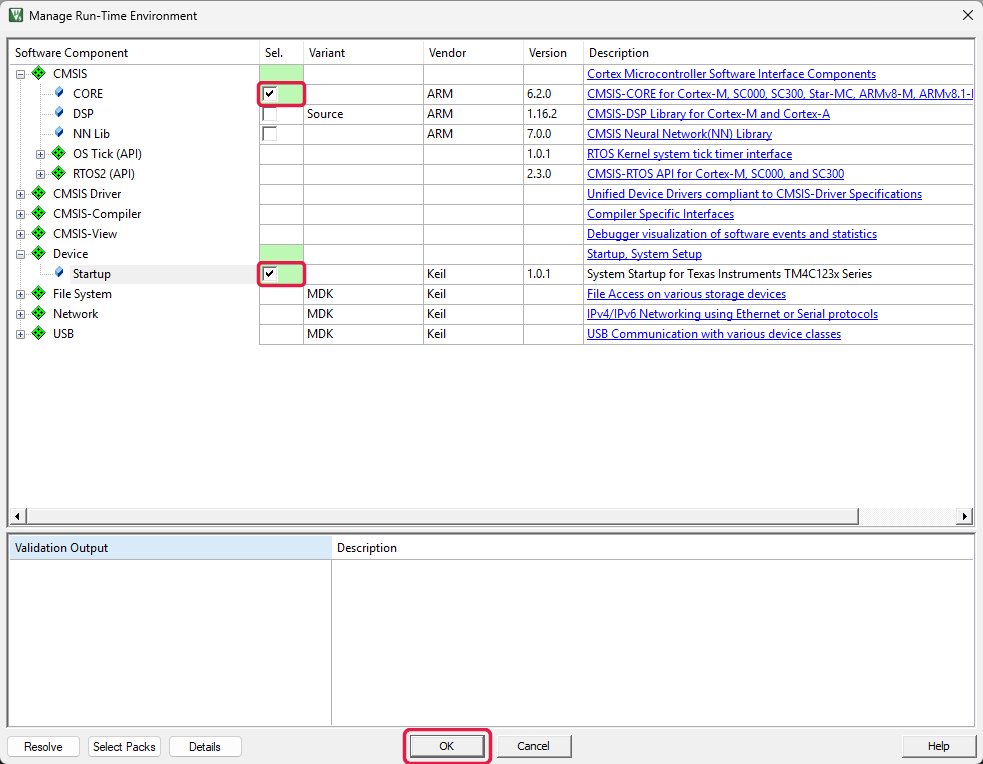
The Manage Run-Time Environment window opens. This time you do want Keil's ready-made files:
- Expand CMSIS and tick CORE.
- Expand Device and tick Startup.
- The Sel. column turns green. If any row is yellow or orange, click Resolve at the bottom-left.
- Click OK.
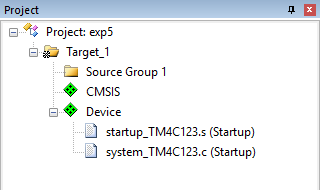
The Project panel now has a Device group containing two files Keil manages for you:
| File | What it does |
|---|---|
startup_TM4C123.s | The vector table (stack pointer, reset handler, and an entry for every interrupt) plus the reset code. After reset it calls SystemInit, then jumps to your program. In experiment 6 you will name your interrupt handlers to match the entries in this file, e.g. GPIOF_Handler. |
system_TM4C123.c | SystemInit(): sets up the clock before your code runs. |
Don't edit these directly
The small key icon means the file is managed by the pack. To look up an interrupt handler's name, open startup_TM4C123.s and read the vector table, but write your handlers in your own file.
Step 5: Add your program
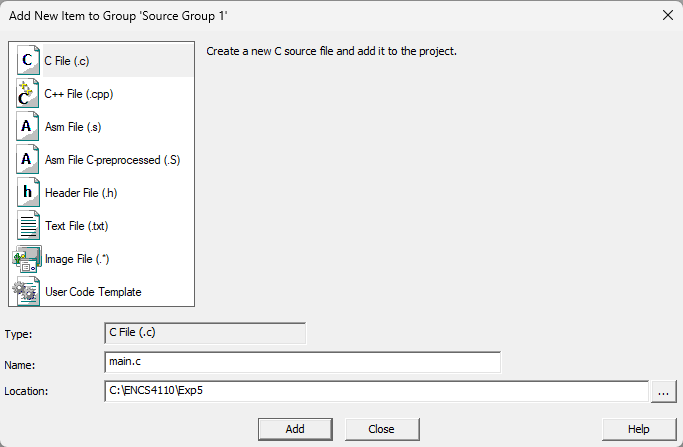
Right-click Source Group 1 → Add New Item to Group 'Source Group 1'…, then:
- For a C program (experiments 6–10): choose C File (.c), name it
main.c. - For an assembly program (experiment 5): choose Asm File (.s), name it
main.s.
Paste one of these test programs and save with Ctrl+S. Both drive the red LED on PF1:
#include "TM4C123.h"                 // Register names for the TM4C123 (from the pack)

#define RED_LED 0x02                 // PF1

int main(void) {
    volatile unsigned int i;         // volatile: keep the delay loop

    SYSCTL->RCGCGPIO |= (1 << 5);    // Turn on the clock to Port F
    GPIOF->DIR |= RED_LED;           // PF1 is an output
    GPIOF->DEN |= RED_LED;           // PF1 is a digital pin

    while (1) {
        GPIOF->DATA ^= RED_LED;      // Toggle the red LED
        for (i = 0; i < 1000000; i++) {}  // Wait a bit
    }
} AREA MYCODE, CODE, READONLY
THUMB
EXPORT __main ; The startup file jumps here
__main PROC
LDR R1, =0x400FE608 ; RCGCGPIO
LDR R0, [R1]
ORR R0, R0, #0x20 ; Turn on the clock to Port F
STR R0, [R1]
NOP ; Give the clock time to start
NOP
LDR R1, =0x40025400 ; GPIOF DIR
LDR R0, [R1]
ORR R0, R0, #0x02 ; PF1 is an output
STR R0, [R1]
LDR R1, =0x4002551C ; GPIOF DEN
LDR R0, [R1]
ORR R0, R0, #0x02 ; PF1 is a digital pin
STR R0, [R1]
LDR R1, =0x40025008 ; GPIOF DATA, masked to PF1 only
MOV R0, #0x02
STR R0, [R1] ; Red LED on
STOP B STOP
ENDP
ENDmain or __main?
The startup file always jumps to a symbol called __main (two underscores).
- In C,
__mainis supplied by the C library: it sets up your global variables and then calls yourmain(). So writeint main(void). - In assembly there's no C library, so you provide
__mainandEXPORTit, as above.
A project has exactly one of these. Two files both defining main (or __main) will not link.
Step 6: Set the project options
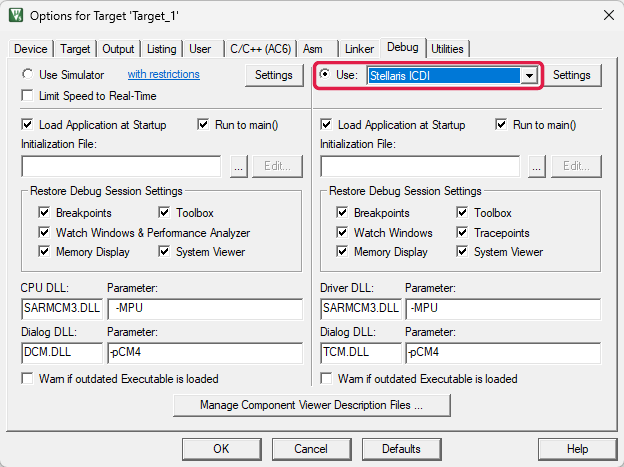
Open Project → Options for Target 'Target 1'… (Alt+F7, or the magic-wand icon). Keil's defaults are fine everywhere except the Debug tab, where you tell it to use the board instead of the simulator.
Debug tab: select the Stellaris ICDI
On the Debug tab:
- On the right half, select Use: and pick Stellaris ICDI from the drop-down.
- Make sure Load Application at Startup and Run to main() are ticked. (For an assembly program, untick Run to main().)
- Click OK.
"Stellaris ICDI" isn't in the list
The ICDI add-on is missing or went into the wrong folder. Re-do setup Step 3, restart Keil, and check again.
Set it once, copy it after
These options are saved in the project. For the next experiment, you can copy the whole project folder, rename it, and replace main.c, instead of starting over.
Step 7: Build
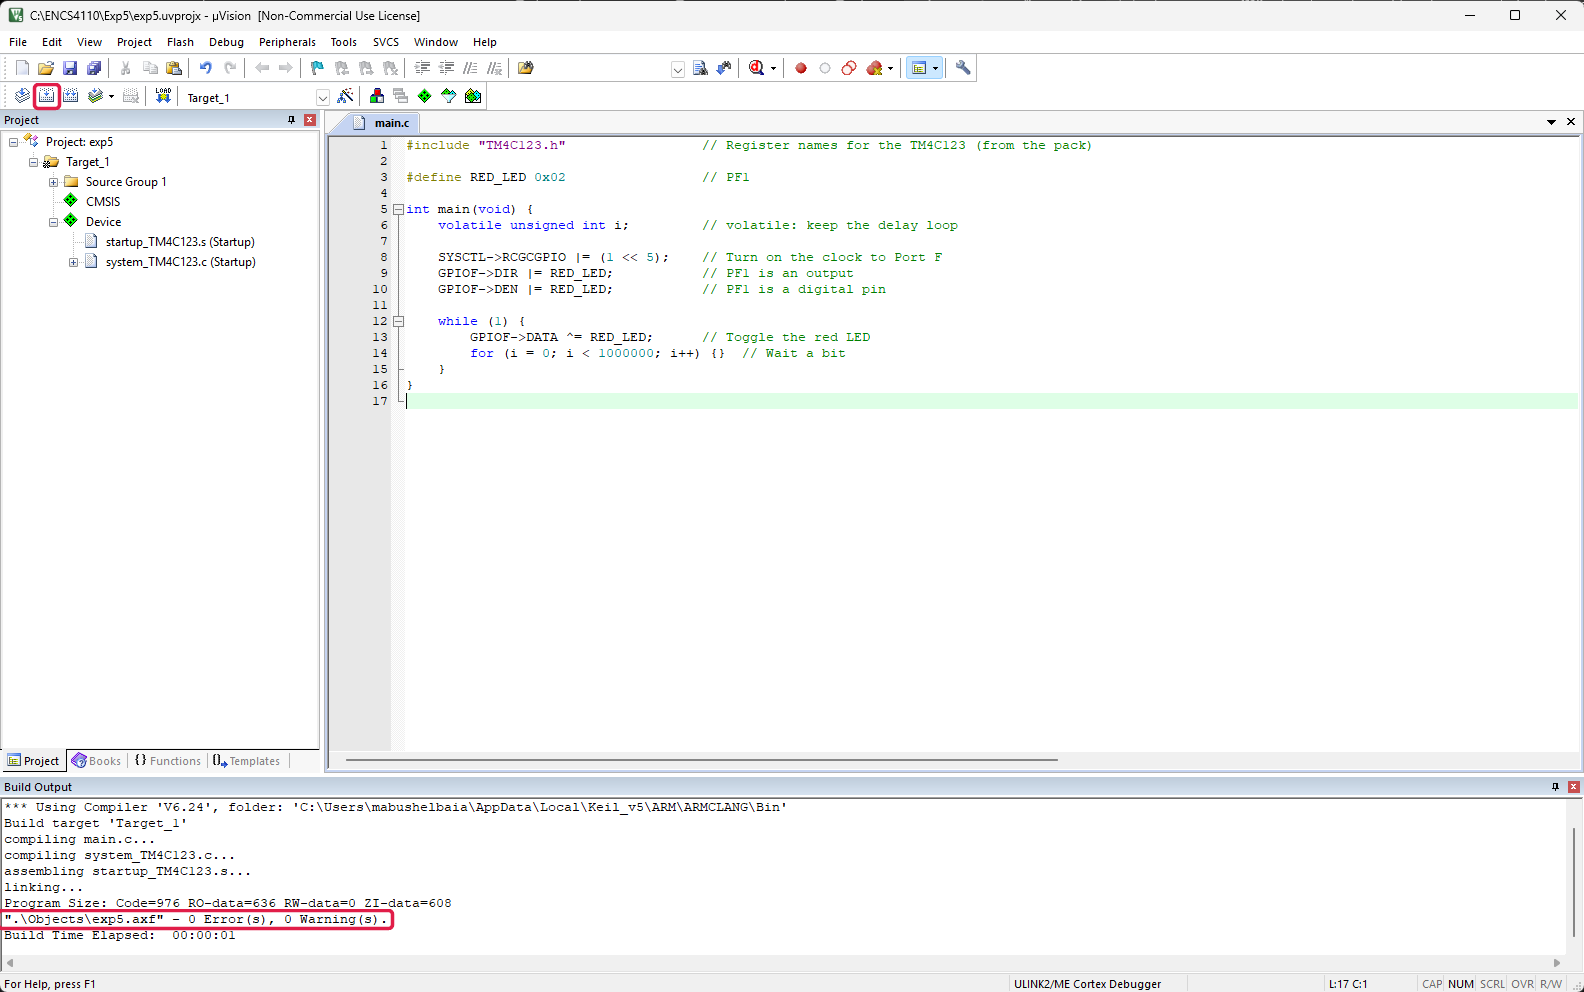
Project → Build Target (F7). The Build Output should end with:
".\Objects\exp5.axf" - 0 Error(s), 0 Warning(s).The first build of a project also compiles system_TM4C123.c and assembles the startup file, so it takes a little longer.
Step 8: Download to the board
Flash → Download (F8, or the LOAD icon with a downward arrow). Keil erases the chip, writes your program, and checks it. The Build Output shows:
Erase Done.
Programming Done.
Verify OK.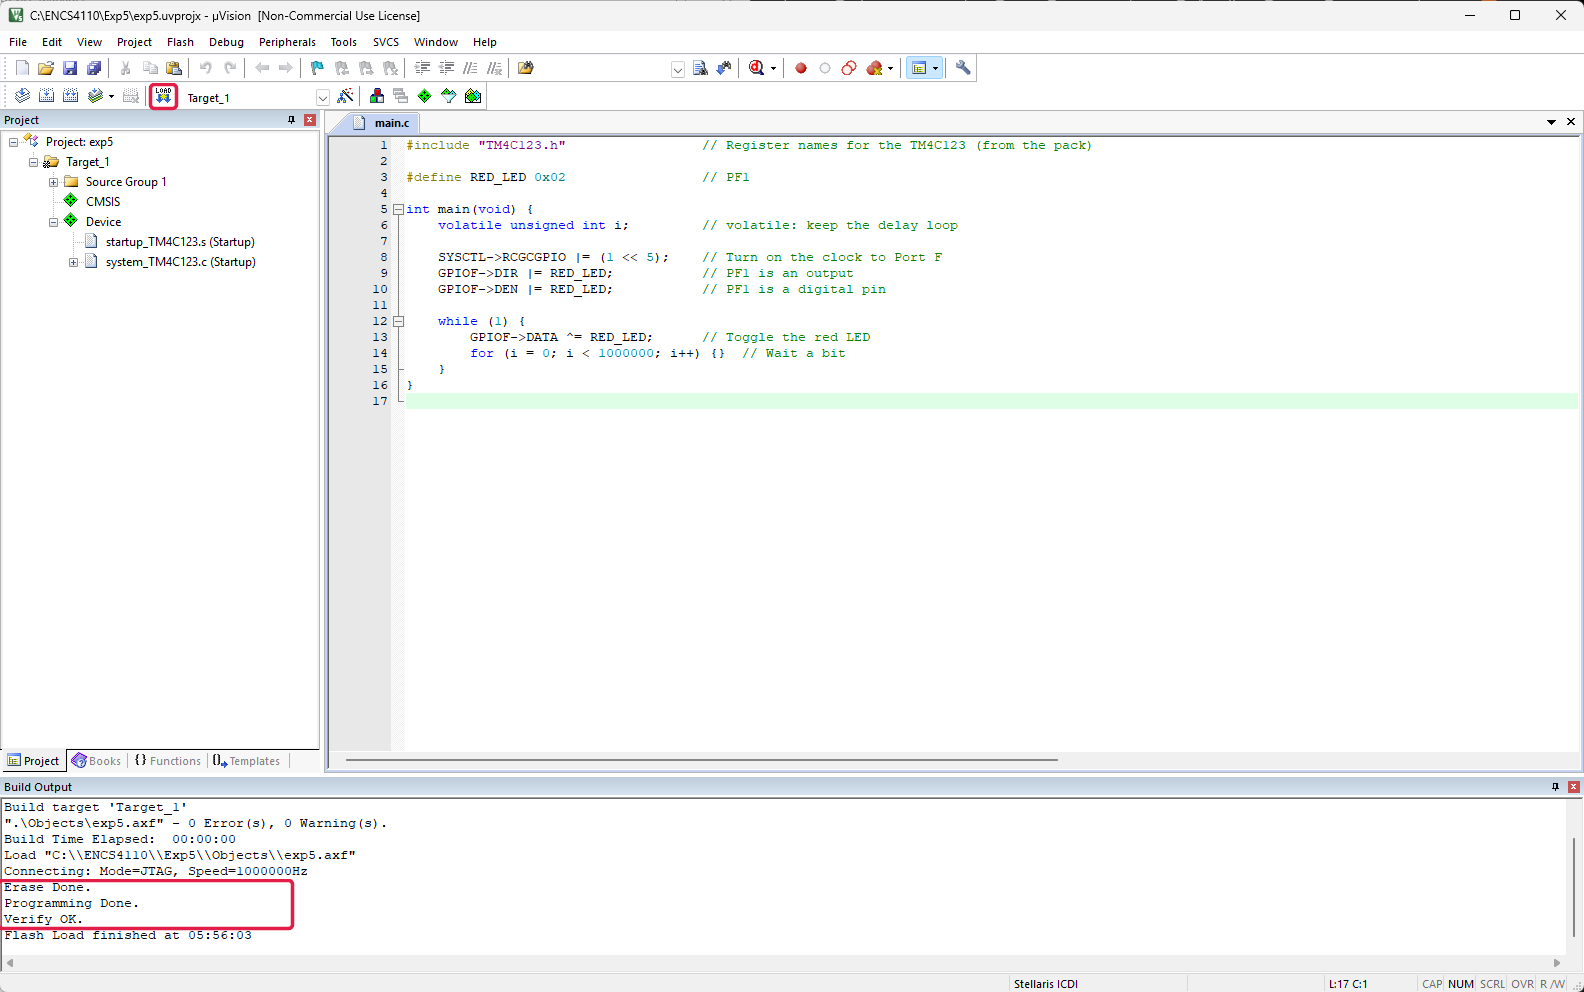
Now press the RESET button on the board (next to the DEBUG USB port). The red LED should start blinking (or, for the assembly version, stay on).
The program stays in flash: unplug and replug the board and it runs again.
Step 9: Debug on the board
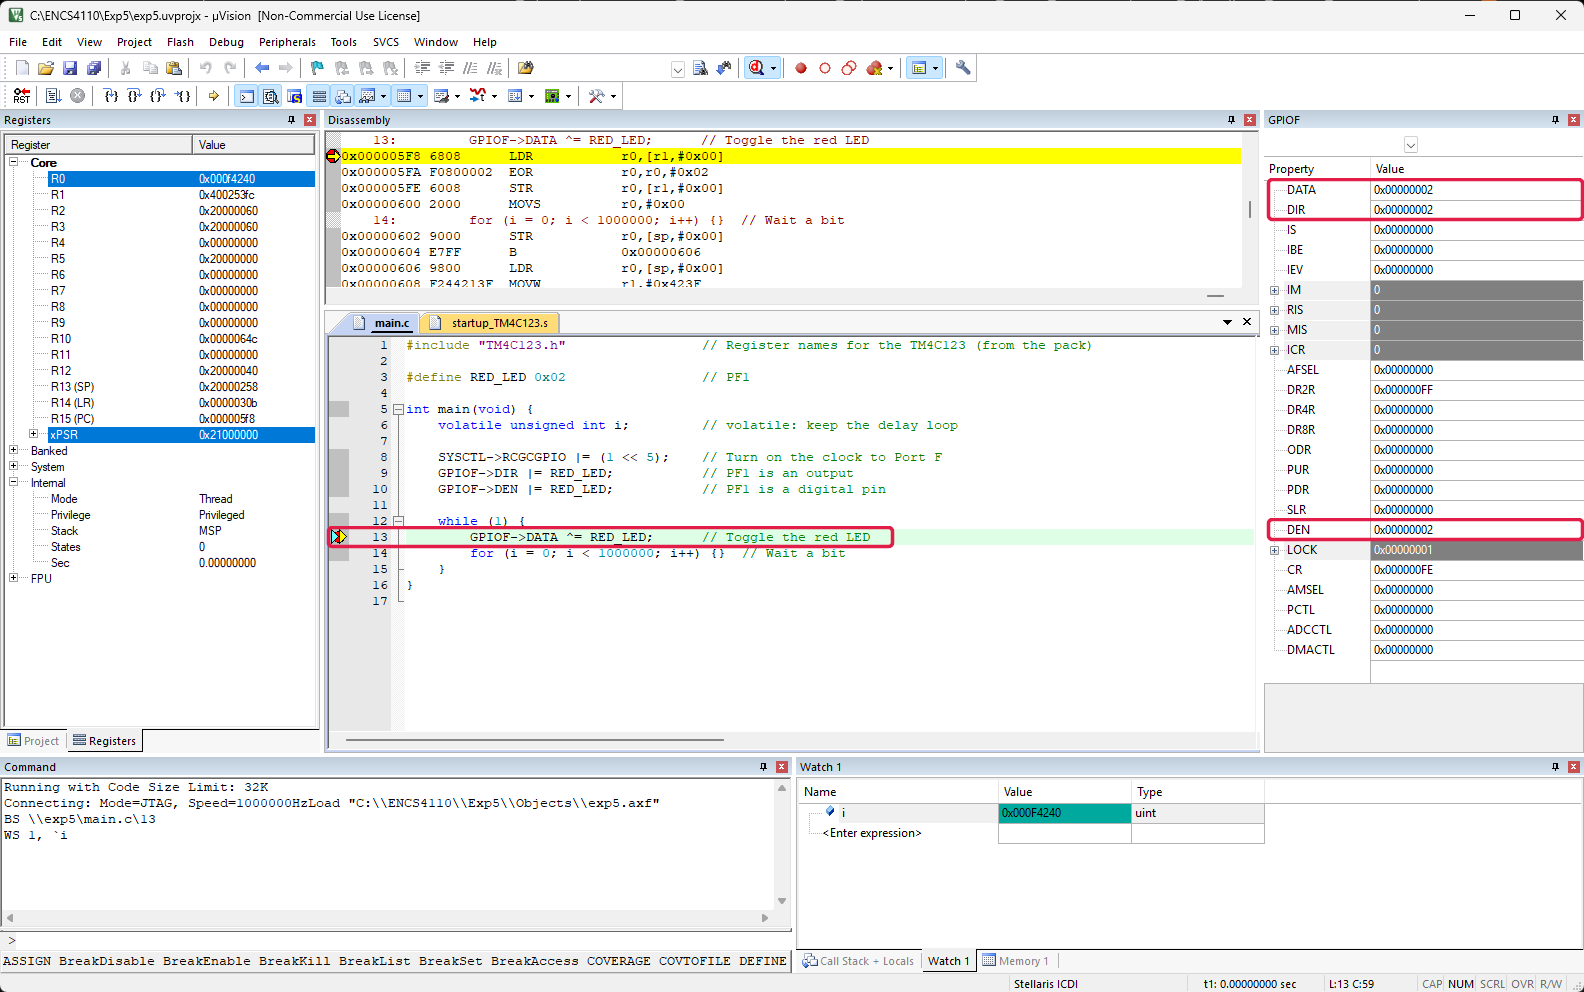
Debug → Start/Stop Debug Session (Ctrl+F5). Because of the options you set, Keil flashes the latest build and stops at the first line of main. Everything from the Assembly Project's debug controls works the same, except now the code runs on the real chip:
- Press F5 (Run) and the LED blinks. Press Stop and it freezes mid-blink.
- Put a breakpoint (F9) on the
GPIOF->DATA ^= RED_LED;line, then press F5 repeatedly: the LED changes once per press.
Watch the hardware registers
Peripherals → System Viewer → GPIOF opens a live view of every Port F register. Step over the DIR and DEN lines and watch bit 1 flip. You can also click a bit to change it and see the LED react.
System Viewer only shows "Core Peripherals"?
The pack's System Viewer file hasn't been generated. Stop debugging and follow Generate the System Viewer file in the setup guide; it takes two commands.
Watch your variables
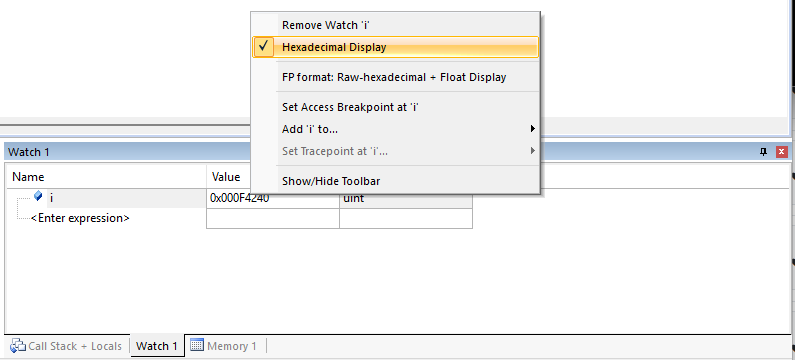
View → Watch Windows → Watch 1, then double-click <Enter expression> and type a variable name (such as i). In the experiments you will use this to read ADC results (experiment 9) and counters. Right-click a value → untick Hexadecimal Display to see it in decimal.
Stop debugging before re-flashing
End the debug session (Ctrl+F5) before editing and pressing F8. While the debugger is connected, Keil can't download separately.
Troubleshooting
| Message or symptom | Cause and fix |
|---|---|
cannot open source input file "TM4C123.h" | The device isn't TM4C123GH6PM, or CMSIS → CORE / Device → Startup aren't ticked. Check Options → Device and Project → Manage → Run-Time Environment. |
Undefined symbol main (referred from __rtentry2.o) | Your C file has no main(), it's misspelt, or the file isn't in the build. |
Undefined symbol __main (referred from startup_TM4C123.o) | Assembly project: your file doesn't EXPORT __main, or the label isn't spelt __main (two underscores). |
Symbol main multiply defined | Two files in Source Group 1 each have a main. Remove one, or right-click it → Options for File → untick Include in Target Build. |
No ICDI device was found / Flash Download failed - Target DLL has been cancelled | Keil can't see the board. Check the DEBUG port and switch, try another cable and USB port, and check Device Manager shows the Stellaris entries. Close any other program using the board (another Keil window, a terminal on the COM port). |
Flash Download failed - "Cortex-M4" | The flash driver is wrong. In Options for Target → Utilities, tick Use Debug Driver (or pick Stellaris ICDI). |
| Download says Verify OK but nothing happens | Press RESET on the board. If still nothing, check you are toggling the right pin (red LED is PF1, 0x02). |
| The LED never blinks, but stepping works | The delay loop was optimised away. Declare the loop counter volatile, or set Options for Target → C/C++ (AC6) → Optimization to -O0. |
L6050U: The code size of this image exceeds the maximum allowed | You hit MDK-Lite's 32 KB limit, usually by using printf or floating-point maths heavily. Remove what you don't need. |
| Peripherals → System Viewer lists only Core Peripherals (no GPIOF, UART…) | The .SFR file for the chip is missing. Generate it with SVDConv: see setup. |
Watch window shows <not in scope> | The program is stopped outside the function that owns the variable, or optimisation is above -O0. Make the variable global or step into its function. |